|
Not to start off sounding vulgar, but this semester, I learned CRAP. I have been exposed to these design principles in numerous courses during my time here at USM, but this semester I really gained a better understanding of the principles of contrast, repetition, alignment and proximity. Some of the most important ideas that have stuck with me are those that added to my previous knowledge. For instance, I understood that contrast applied to color, but I did not understand that it could also apply to size, shape, and font choice. Knowing this, I can recognize it in the designs of others and use it to make my own designs better. I understand repetition now almost as branding. In the past, I had used it to repeat elements in a webpage, but in this course I learned how it can pull many designed pieces together. I realize that alignment is not just right, center, or justified. It refers to elements being aligned even if they are not right next to each other on the page. For proximity, I learned a lot. I knew it had to do with putting things close to each other, but I mostly applied it to pictures and text. In designing different types of documents, I learned that similar types of information must be placed in proximity to each other. Sometimes, as the designer, I had to take things apart to really put them together. One of my weak points is using the features of InDesign that make the job easier. I know if I set up paragraph styles and character styles ahead of time, the formatting is much easier, but I often forget to do it. I did use these on the Newsletter project and it was very easy to complete for that reason. I still have some trouble choosing contrasting fonts. I feel that this is more because I do not know many styles, thought. I do understand the rules behind choosing them and making them concordant. My strong point is that I now know most of the tools and understand how to use them. This makes the job of designing so much easier. When you have the idea in your head, but you cannot figure out how to produce it in the program, it is frustrating. However, I know what most of the tools do, and I have learned even more than what was in the book out of necessity. That makes my design work easier to do. I have already begun using these skills in my own instruction. I will attach some of my designs here, but I have used the skills from this course to redesign a flyer for our reading fair that did not have good proximity (or really any other design principles). I have created a new set of posters for the library. And, I have used the principles to create flyers for around the library. I used them as well when I created my final e-portfolio for my master’s degree. I thought this was going to be a fun class to take, and it was. However, I was surprised that I have used more knowledge from this class immediately, than I have from any other class I have taken. The program being available to me at work is probably a big reason for that.
0 Comments
In exercise 15, I created an e-book, or rather helped finish one. I would not say it was much in terms of design, but I found it interesting that the way the document was formatted in InDesign affects how it appears on the user's screen. Exercise 16 was creating an app for an iPad. Personally, I think the author spent the least amount of time on the design of this publication, probably because of the technical work that is involved in getting everything to work correctly. There were several parts of the exercise that I could not complete because my version of InDesign CC does not support the current version of DPS. I did what I could with the limited tools and Overlay window which was almost too small to see. Some of the buttons were not displayed either because of the size. I did not have the option to preview what I created, so I am not really even sure what it looks like.
Do I seem proud much? So, now I think THIS is my best design so far. I really had fun with this project. I feel like this was the first time that I really used the tools in InDesign as they were meant to be used. First, I set up my document as letter sized pages. When I originally set it up, page 1 and 4 were orphaned at the top and bottom. I got them into spreads by turning off the Shuffle page option, creating an alternate layout, then renumbering each page by clicking on the page and clicking numbering and adding them that way. I got all of my content from http://mercola.com. I put this info on my newsletter along with a disclaimer because I do not want anyone to think that I was stealing the information. That is why there is an additional note on page 4, in case the newsletter was downloaded by someone else and posted outside of this blog. All of the pictures were taken from http://pixabay.com which provides images that do not need attributions. For repetition and to keep the document looking like one consistent unit, I used the blue color, and the line with a slope in the middle for all of the page numbers. To kind of break the rule for design sake, I left this off of page 3 (where the picture of the woman's waist is). I didn't feel like it fit on that page, and the number appearing on page 2 would allow the reader to understand the facing page was page 3. I also used a consistent font, but changed the size and color for contrast. Also, for contrast, I used blue on white for some titles while I used white on blue for others. For alignment, I tried to keep all text boxes and pictures in line with one another. I allowed the slope in the break line to create some points for alignment. Proximity was followed by keeping like things together. For instance, the title and issue information is together, the table of contents appears as one unit, and the stories are in order based on the first set of bullet points. In setting up the document I first created the line with the slope in the middle. I put those at certain points such as breaking up the first page, the footers of each page, and the picture area on page 3. I first created this with the line tool. I did not realize to create a frame I had to join the paths, so at first I tried simply grouping them as objects. However, this did not allow me to put content inside. So, next, I ungrouped each set and joined the paths. This allowed me to create frames that could be filled with color, etc. Before adding content, I set up the entire document with text boxes and graphic frames. Then I realized that on my previous projects, one of the most time consuming parts was that I had to constantly format text. So, for this document, I went into each text box, and formatted the paragraph style using a few that I had set up previously. It was much easier and it allowed me to copy and paste text which took on the format I had previously selected. I also got ahead by selecting several image options and saving them to the Newsletter file ahead of time. This helped speed up the process, because I did not have to stop and choose photos as I worked. I am interested to hear feedback because I am not sure if the light blue text was the best choice in the newsletter. I think it will show up ok with high quality printing, but I am not certain. I sent my document off to Fed Ex printing to get a tabloid size print. I can't wait to see it. REVISION For the revision, I mainly tweaked some small errors. I changed the alignment on page one. I also went in and capitalized the title as requested and a few other areas. I changed the aging title to match the others. I had originally planned for that to be part of the first article, but I agree it looks like a stand-alone article so it should have a similar heading. I also fixed the tab alignment on the table of contents.
 In this project, I created, or rather completed, an interactive PDF file. I did not know that could be done with InDesign and it was quite simple to complete. I have used interactive PDF forms before, but I have never worked on one. I imagined they required a knowledge of code, but this did not. With InDesign, it is easy to add buttons and fillable fields to a form. This could work as a webpage too, because the form works by emailing to any address you choose when the user clicks submit. One change I would make as a designer would be to have the submit button actually say "Submit". As it is, the text is above the button, and while it should be clear to most people, I could see how it might confuse others.
This project is my best design yet, in my opinion. I created a brochure for my library using a design I borrowed heavily from a template. (I did not use a template for this, I created it myself. The template was just inspiration). The template I based it on used hexagons where I used circles. I decided on circles because they resembled bubbles and our mascot is a shark. I also changed the colors. I used our school colors: red, black, gray, and white for the brochure. I included the circles or bubbles in different areas for repetition. The colors and logo repeating are also for repetition. Although the bubbles and shapes may seem to be free floating, I attempted to align all of them to something. It may be the edge of another shape or the center, but I did not just place them haphazardly. For proximity, I tried to place like items together. For example, all of the contact info is close together and policies are close together. Contrast was achieved with color, text size/font, and the shapes. One area I felt was not as good was the shark picture. I placed a red tint over it to attempt to get the colors to match better. I am not sure that it worked the way I intended. On the inside of the brochure, I broke the three column alignment and chose to have it spread out. The template I viewed did this, and it was part of the design that I liked. It is hard to tell unless the document is printed, but the circle with the magnifying glass inside will line up with the other when the brochure is folded properly.. The template I saw, did the same thing with a hexagon pattern and I liked it. So, I tried to make it work in my design as well. I enjoyed creating this project, and I am working on another brochure for another school right now. REVISION For the revision of this project I took several suggestions into account. Dr. Wang thought that I used too many font sizes. For the most part, I have adjusted all of them to the same font. She also suggested changing the pull quote text to italics to show it was not a mistake. I noticed that for one caption I used small caps but not for the other, so I adjusted that as well. When I saw my brochure on the larger screen, I felt like there was too much space around the graphics. I decided to put a bar and the top and bottom in order to give it a bit of a frame. I adjusted some other font sizes and changed the two columns in the middle inside to one block of text. I also adjusted the graphics to fit better with the captions. The most noticeable change on the cover is probably the addition of a box under the title. I changed the font color for more contrast. Second Revision I added the black bars to the second page. I made some alignment and size fixes. I also readjusted the text wrap on the circular image to allow it to appear outside of the drop shadow.
 This exercise was fun! I got to pretend I was a designer sending my work to the printer. As far as design goes, I didn't do much. Mostly, this lesson was about learning how to ensure colors are correct. and ready for the final printing. From a design standpoint, it is a simple design, but it is somewhat appealing. The color scheme is monochrome with a pop of color on the title and the model's scarf. The font choices are good. There is enough difference between the different types of fonts. The main font is a sans serif and the other is a script font. To me, if it were a true magazine cover, the designer would have more content on the sides of the page. There are no article titles listed. For alignment, one thing I notice is that the "Special Issue" is lined well with the model's hood. The other info on the page, such as the title, date, tagline are in good proximity and alignment with each other and the page itself. There is contrast with the monochrome photo and the title. The title and tagline at the bottom also provide some repetition to finish out this piece. I learned how to package a document for the printer, and I recently used this to send all of the links and pieces for my brochure project to myself.
 While I was not a fan of this design, the exercise itself was helpful in learning how to use layers. In the exercise, we created a menu for a fictional restaurant. Again, most of the work was already done. The work was in tweaking effects to the images and other objects. One thing I found missing from this exercise was learning how to create shapes in InDesign. In the text, the author says that the circles were created that way. I would have liked to have learned how to do that so that I could use this skill in other projects. I had some trouble following along with the tinting and adjusting. It took me several tried to get the coloring right with the starburst around the fish. I think I had selected the wrong object when I originally worked through the exercise. As far as the design goes, I am sure the colors used were chosen according to one of the rules we learned, but I do not like them. I don't think I would be impressed with this cover if I were a patron or the restaurant owner who had it commissioned. While the contrast and alignment of the text and objects are good. I don't like the mixture of real images with clip art. I see the repetition in the circles and swirls, but I don't think they look very professional. Proximity is good as the types of items are grouped together, but to me the part at the bottom looks like a webpage. I did use some of the skills learned here in my CD case project so even though I did not like the design, I did learn from it.
 Exercise eleven was probably the one item that I would have the most use for, but there are other ways to create a table in free programs. I'm not sure I would use InDesign to do it. The one thing that I really liked was the fact that when I created the table in InDesign the data correctly went into different cells. Sometimes when you attempt to paste data into a table in Word or Excel, it just pastes everything in one single cell. I'm not sure if that was a feature of the program or if it was based on the text formatting. Most of the work in this exercise was already done for me. I did like using the Character styles features again, because I find those to be very helpful As for the design principles, the color scheme was nice and complementary. I think this would be a form of monochrome. The contrast of the headings to the regular cells made it obvious what is being presented. Alignment was very easy to see with the use of a table, and proximity was followed as all items are with similar items.
 The projects that I am creating are getting easier to do. I think it is because I have more skills in using InDesign. For this project, I began by creating some overlays and backgrounds using the free tools at picmonkey.com. For my background, I started with a starburst pattern. I used the streamer overlay, and then used a water overlay on top of that. The three layers give the background some dimension. Next, I used the "Buggies" overlay to create a few images for my project. I changed the colors to match my background. Then I made the background of the images transparent. However, when I attempted to load them into InDesign, nothing showed up. I fixed this by opening them in paint and saving them as png images again. When I did this, I lost the transparent background. However, I remembered the tool from exercise 10 and I used the Clipping Path to get rid of the white background. It was very easy because the images were very well defined. I made the images somewhat transparent and added a drop shadow, bevel, and outer glow to them. I noticed they looked more 3D when I did this. For my text boxes, I used the color picker to pick a light color from the existing background. I applied a gradient feather and then adjusted the transparency so that it was not so see-through. I also added a drop shadow so that it would appear to lift off the page. For the back page of the CD, I simply used the skill from lesson 10 where I clicked the object I wanted to match and dragged the fx icon to the new object. By doing this, I was able to format the dragonfly and the textbox on the back page to match the front page exactly. This was the first time I really used the skills I learned from another chapter to make the job easier. Before, I had to click back and forth to match up the settings. While the first page took me some time to create, the second page was very quick for this reason. REVISION For the revision, I changed the inset on the front cover text. It was too close to the top of the text box. 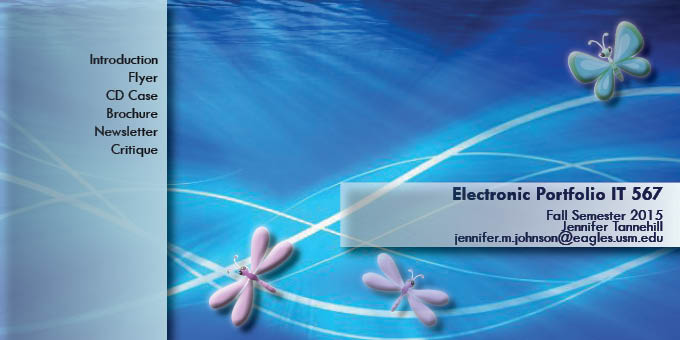
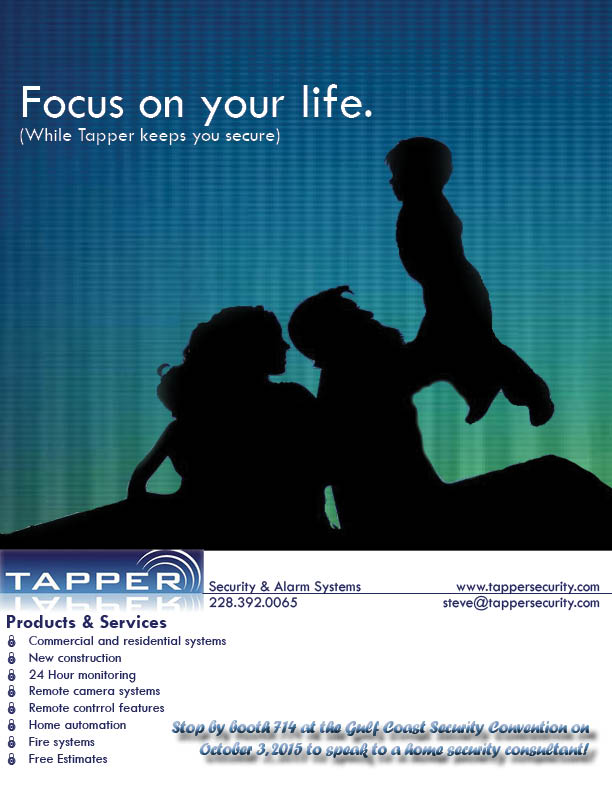
Recently, I noticed a post card for a security company that did not follow many of the design principles we have been studying. I decided to use that as the foundation of my flyer project. I felt like I could use the principles and apply them to the content of the post card to create a flyer. I used some elements from the company's website to create the background and logo on the flyer. I used a free image from pixabay.com for the family image. I edited this image using picmonkey.com to remove the background to make it transparent in InDesign. I placed the background image down and put the family graphic on top. I wanted the color to extend to the bottom of the page, but I could not have readable font with that pattern. I decided to make the bottom white instead. I used the color picker to choose a font color from the logo. I created a fictional security convention for the flyer's purpose. I also found a lock for the bullets in the list to go along with the "security" theme. Some ways that I felt I used the four design principles are as follows. I used repetition in the colors that I used and also the font styles. I used contrast by choosing a different font for the convention details. I used alignment with the left alignment of the products and services with the logo. I broke the alignment rule with the convention details to help that important part stand out, but I tried to make sure it did align on the bottom and right with other blocks of text on the page.. I used proximity with the contact details and the products and services. On the original post card, some of this info was scattered about. I put it all together. This was not a difficult project, but it was a lot of work because of the time it took to remove the graphic background and find the other elements I needed. REVISIONS For the revision of this project I made several changes. I removed the full stop and parentheses from the heading. I think that was unnecessary. I moved the "convention details" up on to the image and changed the font and color. The way it was previously made it hard to read. I also made the products and services into two columns, and I pulled some info from the business's website to add more to the bottom of the flyer. I think this makes everything more readable. It gives the reader more info about the company, and it has more purpose as a flyer now.
|
Author
BlogrollDana Barhanovich
Paige Crane Mingyu Li Keneshia Raine Corey Robinette Constance Reed Denoshia O'Quinn Sabrina Strickland Shelby Smith Dr. Wang My DesignsThe projects here are both my own designs and exercises completed from InDesign Classroom in a Book. To see all posts, click "All" above. To view only my design work, click "My Designs".
Copyright 2015 by Jennifer Dunkin
|
||||||||||||||||||||||||||||||||||||||||||||||